Add your Domain to Odoo
This article will show your how to add your domain to Odoo in the control panel.
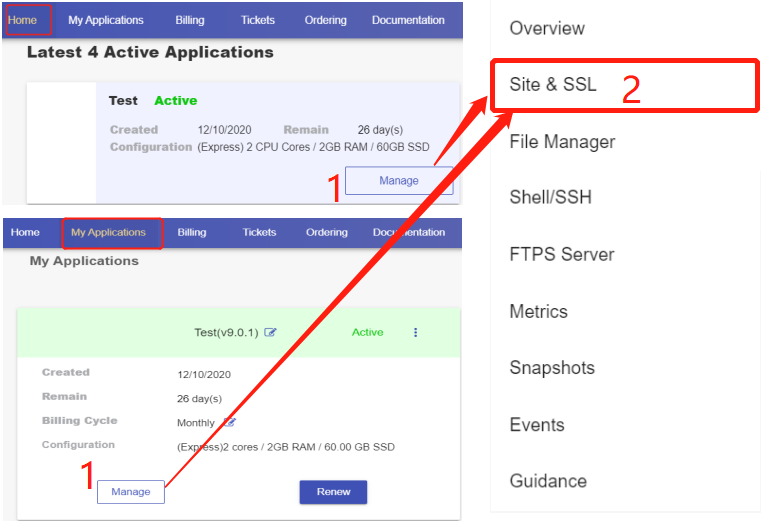
1. Log in to the Client Panel
Please log in to the Control Panel with your credentials. Then locate your target deployment on the Home page or the My Applications page.

2. Navigate to the "Site & SSL" page
Click the "Manage" button on the Home page or the My Applications pgae, followed by the “Site & SSL” tab.
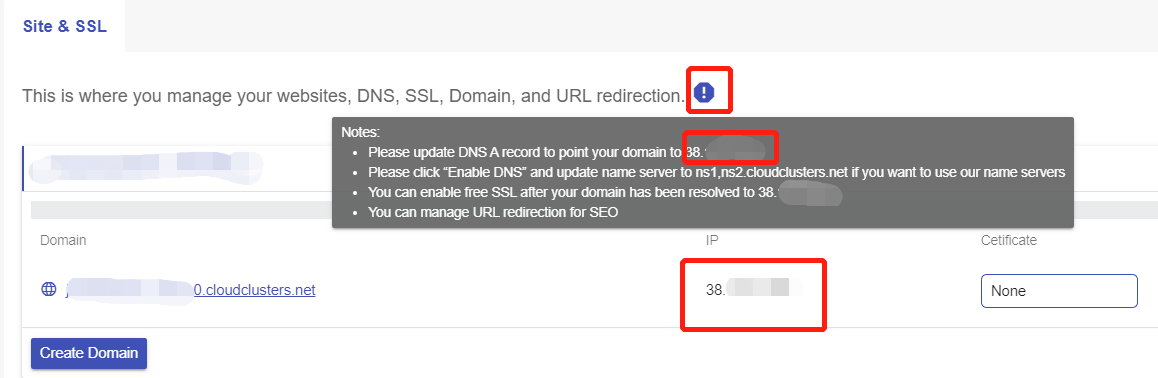
3. Add your domain
On this page, you can see that a default domain odoo-XXXX-0.cloudclusters.net is configured for each newly-created Odoo site. Locate the website and click “Create Domain” to add your customized domain.
Step 1 Click “Create Domain” to add your customized domain.
Step 2 Input the domain name. For example: testsite.com
Step 3 Decide if you would like to use our nameservers or not.
Yes: If you use our nameservers, please set your domain’s nameservers to ns1.cloudclusters.net & ns2.cloudclusters.net.
No: If you prefer to use your own nameservers, you must make the "www" and "none" DNS A records of your domain point to the IP address we provide in the Control Panel.

The IP can be viewed here.
Step 4 Click Create to add your domain.
4. Check Domain
This is a feature to check your domain health. Click the Check Domain button for a domain. You will get the check result in a few seconds.

If there are any issues about your domain, please make sure the issues are addressed.
5.Enable Free SSL
The following steps are for installing free Let's Encrypt SSL to your domain. If your domain is not pointing to the IP address we provide, Free SSL cannot work.

6. Manage your Odoo Site
Now you can manage your Odoo site via browser.